Product Photography Best Practices and Considerations
Are you looking to make high-quality and impactful images of your product? Good photography will help your business grow. The wrong photography could turn customers away. Product photography is an exhaustive subject, but here are a few tips to point you in the right direction!
Focus
Modern auto-focus systems are truly amazing, and rarely miss, even in the hands of inexperienced users. However, it is still entirely up to the photographer to determine not just what, but how much is in focus. In photography, we use the term “depth of field” to describe that quantity. We want sufficient depth to give detail of the entire product but not so much that background elements become a distraction.

The GPS unit is fully in focus. The map is slightly out of focus but we can still see what it is. The far-field is unimportant to the scene and out of focus.
Exposure
Is it too bright or not bright enough? When shooting out in the real world, we are often faced with challenging lighting conditions that include extremely bright spots as well as very dark areas. Consider a sun-dappled forest, for example. The first priority is always to have the subject just right. Next, we want background elements at a level that adds interest to the scene without dominating it. The ideal is to nail it with the correct combination of camera settings, but sometimes we need some help from our editing software to balance things out.

A combination of long exposure time, artificial light sources and editing software were used to illuminate the cabin and backpack, while leaving some mystery in the surrounding forest .
Subject Isolation
The photo needs to be about the product. Having an interesting background is great, be we need to make sure that only what is needed for the scene is included. Ideally, we should spend some time grooming the scene for extraneous debris prior to shooting. Once again, getting it right in-camera and on-location is best, but for uncontrollable elements in the distance (buildings, bystanders, etc.), editing software can be used for digital touch up.
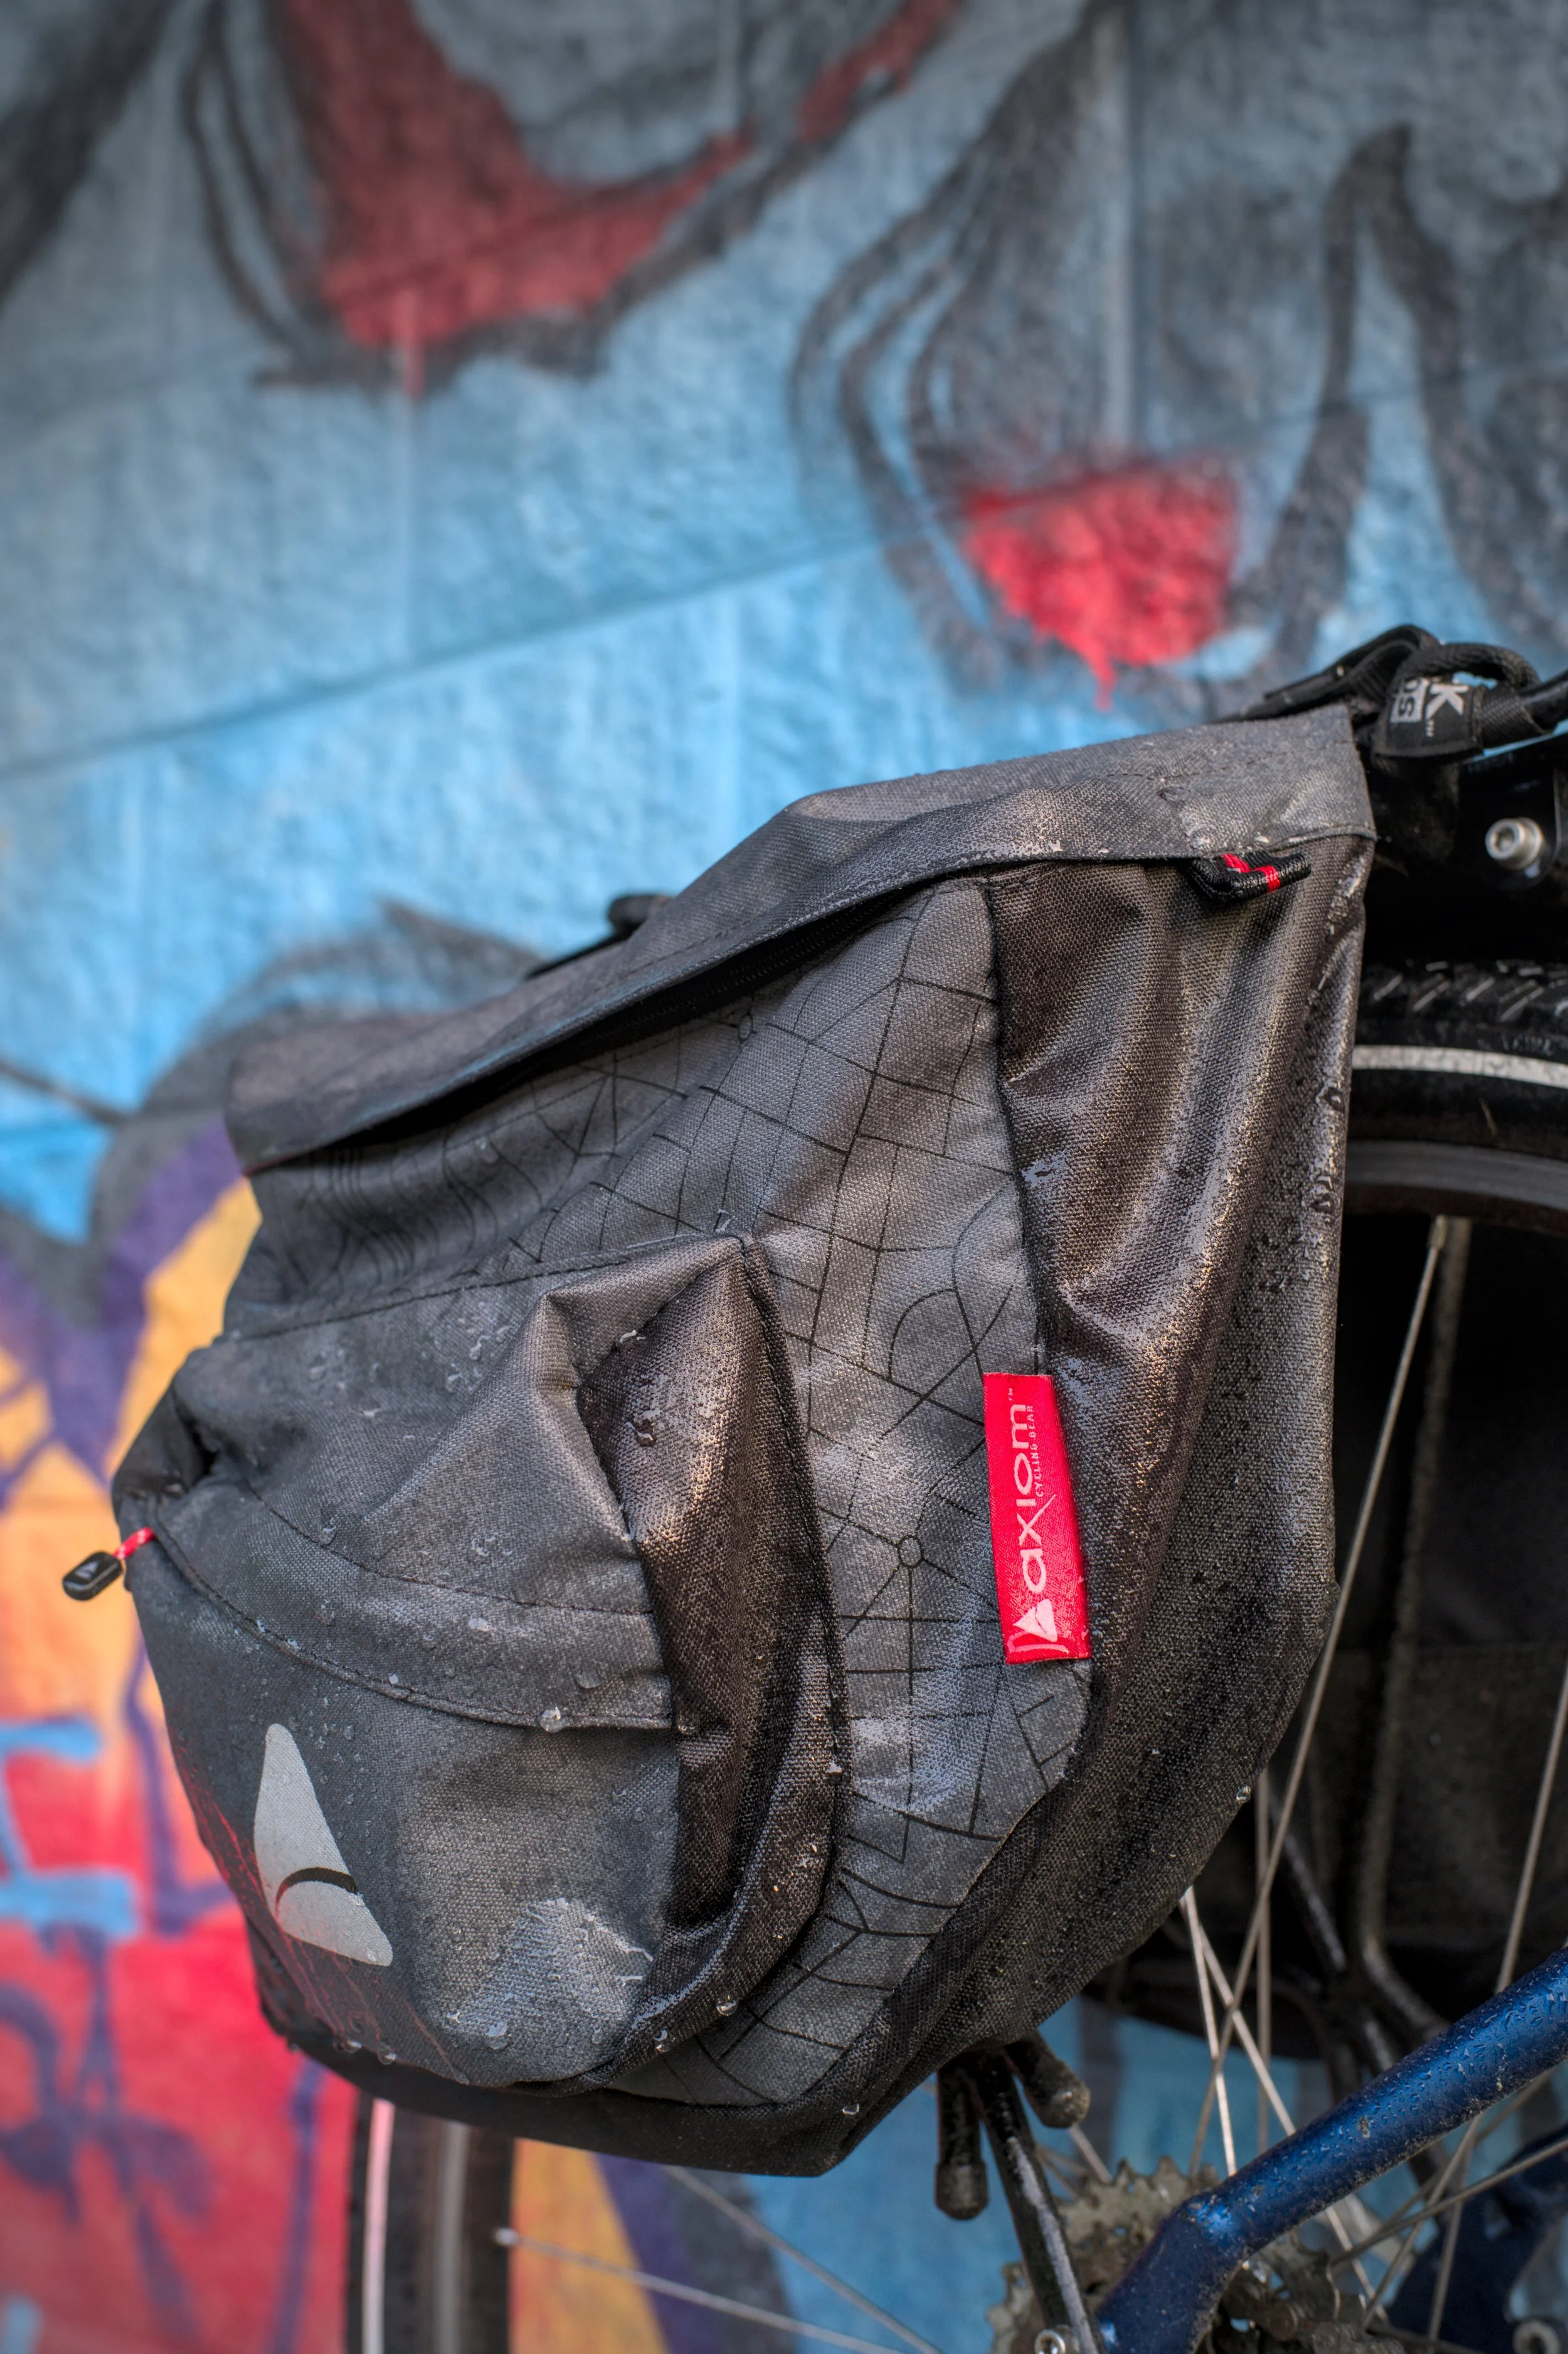
The graffiti on the wall in the background adds color and context to this image without being overly busy. The saddle bags still take center stage by filling most of the frame. Trash and other debris have been cropped out of the frame.
Framing
Where the subject (our product) sits relative to the overall frame of the photo depends on usage and orientation. Are you shooting for a magazine cover? A double page spread? Instagram? Your website? Centered generally looks great for vertical/portrait shots (Instagram), but don’t forget some space for the masthead if you want to see it on the cover of a periodical. For a double page spread, the product should be centered on one page or the other, with space for text on the opposing page. Rule of thirds and horizontal/landscape works well for webpage images viewed on a desktop screen.

This image was composed as an example of a double page spread. The backpack sits centered on what would be the right page. The left page contains a leading line from the reservoir up to the back edge of the cliffs, and leaves space for text.
Relevance
At this point, you’ve made it past the basic nuts and bolts. Congratulations! To go from a technically good shot to one that’s truly compelling, we need to think about what resonates with your end customer. What’s your target demographic? Where do they live? What do they value? Unfortunately, there’s no camera setting for this one. We need to do the research, identify market trends, understand our primary audience and the audience we want to expand to.

Got Rocks? This shot was composed to highlight New England’s rocky, tree-lined and occasionally treacherous trails. Those who ride or hike frequently in the region will feel at home in this image.
Creativity
The best piece of photography advice ever given to me was “no one cares about your darn sunset’s, Taylor”. For product photography, there’s nothing wrong, and maybe even good practice, to have a few generic pretty pictures on hand. However, we also need push a little further sometimes, and make (not just take) an image that stands out and leaves an impression.

This night shot was given some extra “vibe” with an array of lights to illuminate the inside of the tent and paint a spooky forest.